Tien Chiu

  • Home
  • About
    • Honors, Awards, and Publications
  • Online Teaching
  • Gallery
  • Essays
  • Book
  • Blog
  • Dye samples
You are here: Home / Archives for gradient samples

May 23, 2021 by Tien Chiu

Cloth, chocolate, and carousel books

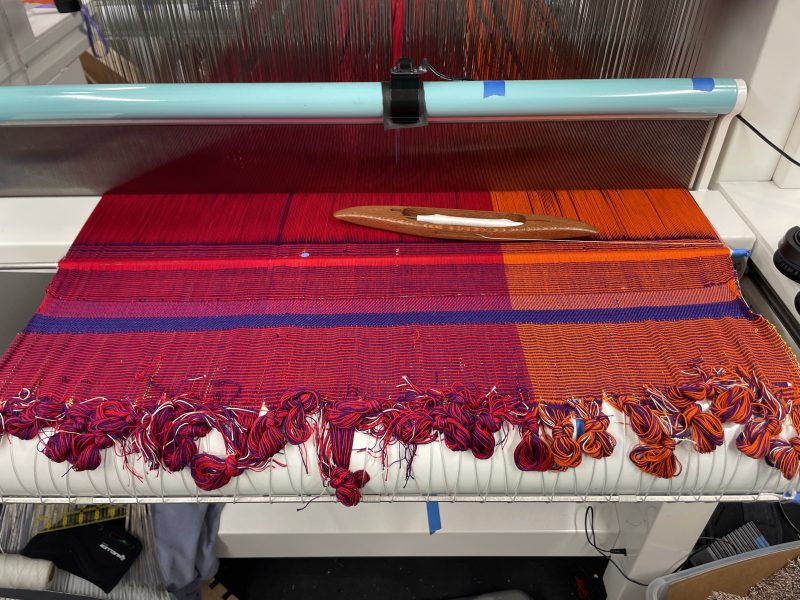
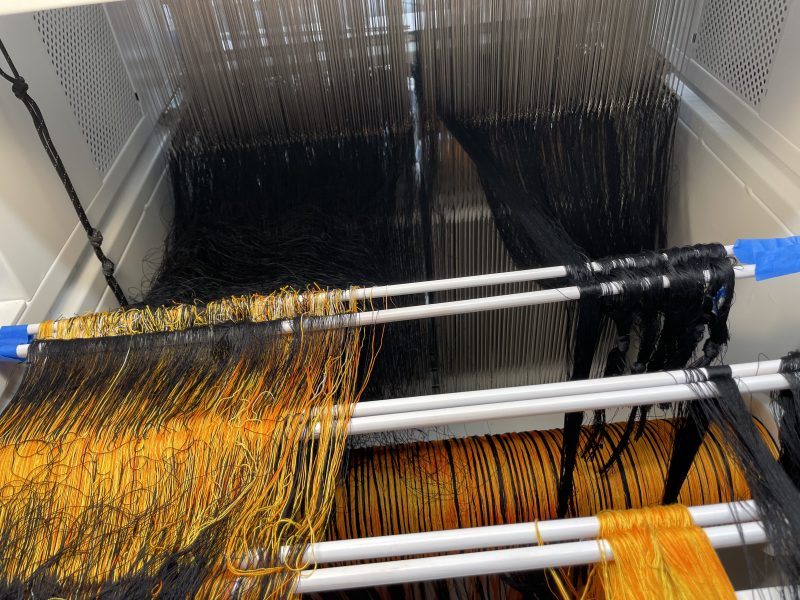
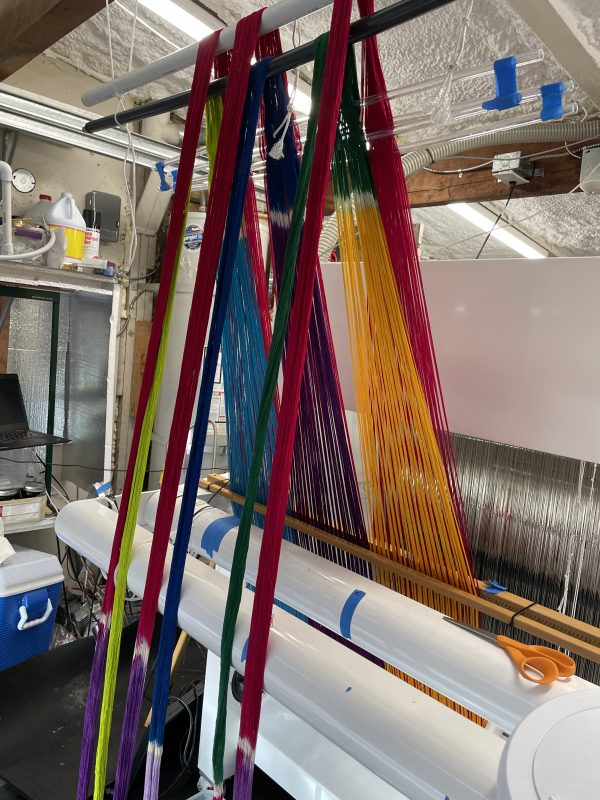
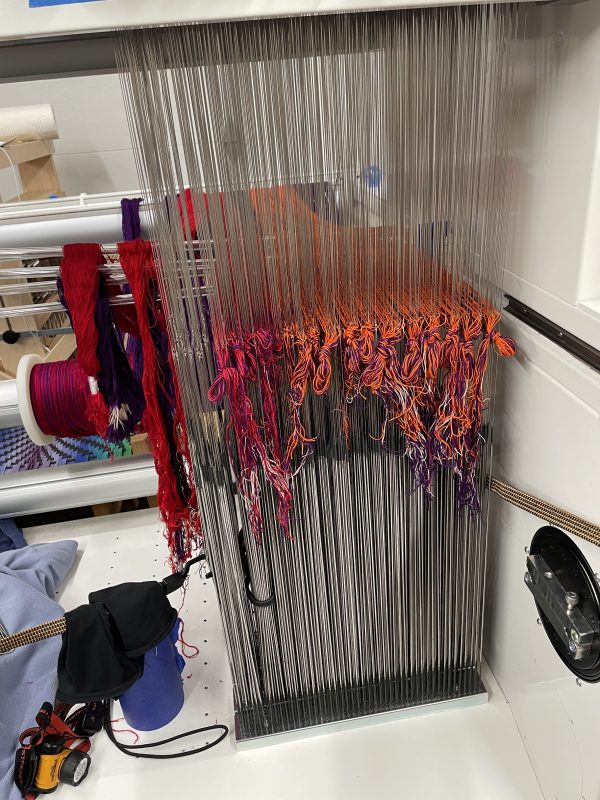
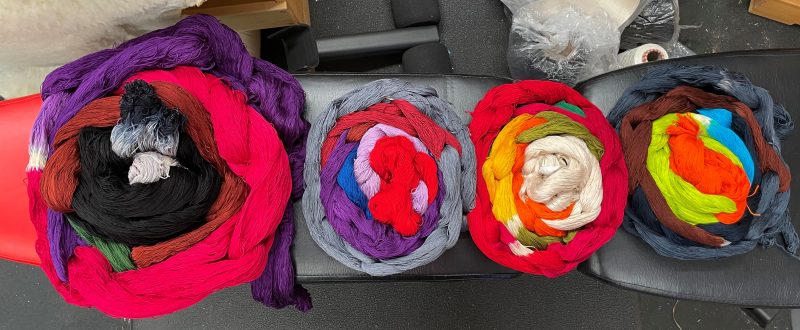
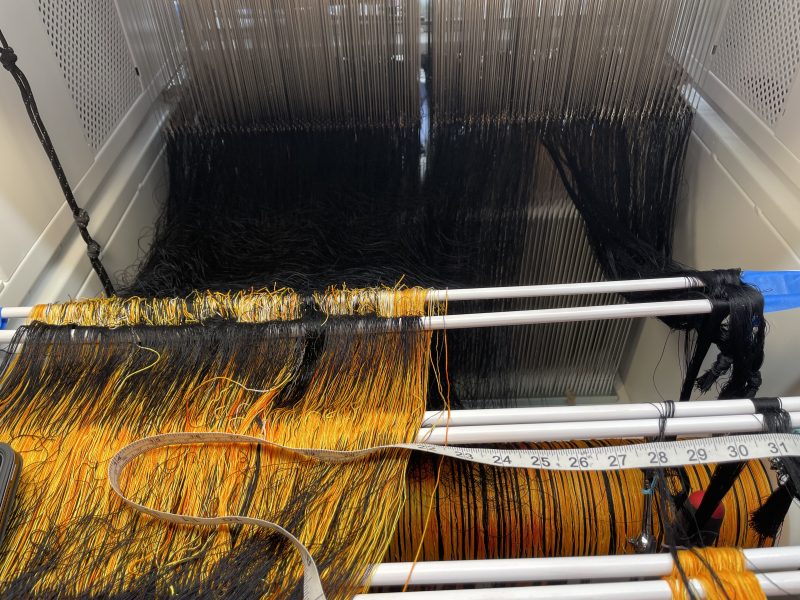
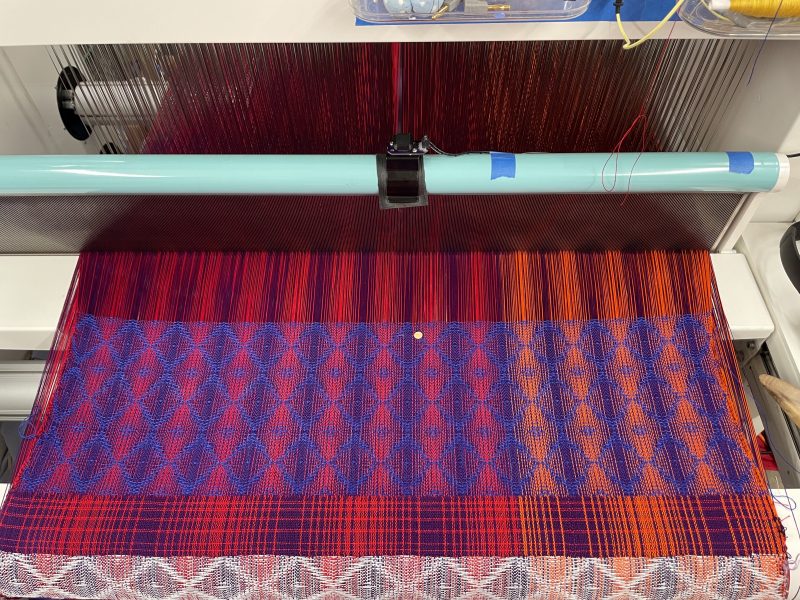
Well! It’s been a packed week and a half. Mostly working on the business, though I did get some weaving in. I am now 70.54% done tying on the “Fire” warp on Maryam, according to my calculations (hey, that .04% is IMPORTANT! Gotta keep up the troops’ morale!):

70 percent tied on - Fire warp on Maryam

I have also made important progress on the gradient warp. I figured out how to align a complex color gradient with a complex draft in Fiberworks and translate the resulting color/draft combination to the jacquard loom. It’s not a simple problem because the color pattern on the jacquard loom isn’t actually color but a structural pattern, and isn’t constructed at all in the jacquard design software the way it is in Fiberworks (shaft loom weaving software). In fact, on my to-do list for today is recording a video walkthrough of the process so I don’t forget how to do it. I will likely publish it on YouTube and in the Jacquard Weaving group on Facebook so that the two other people in the world who might be interested can access it.

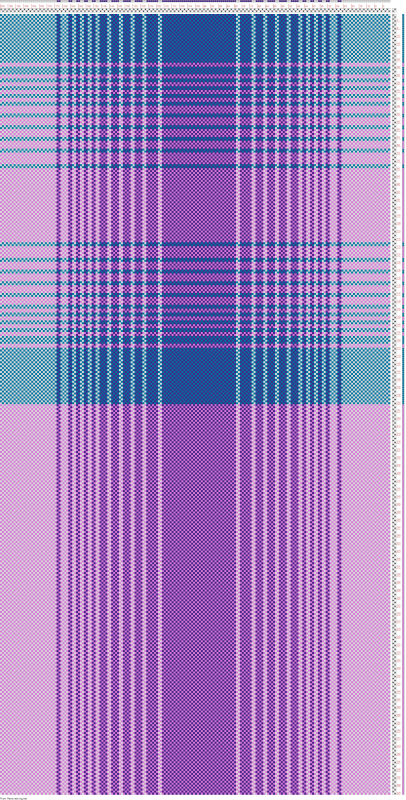
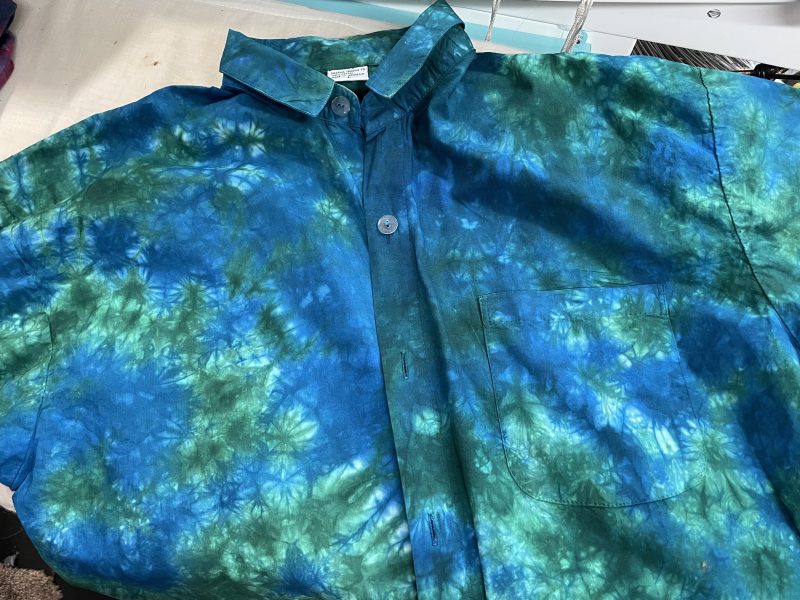
Anyway, the wheels go round and round, and the end result is this:

Advancing twill gradient sample
Advancing twill gradients

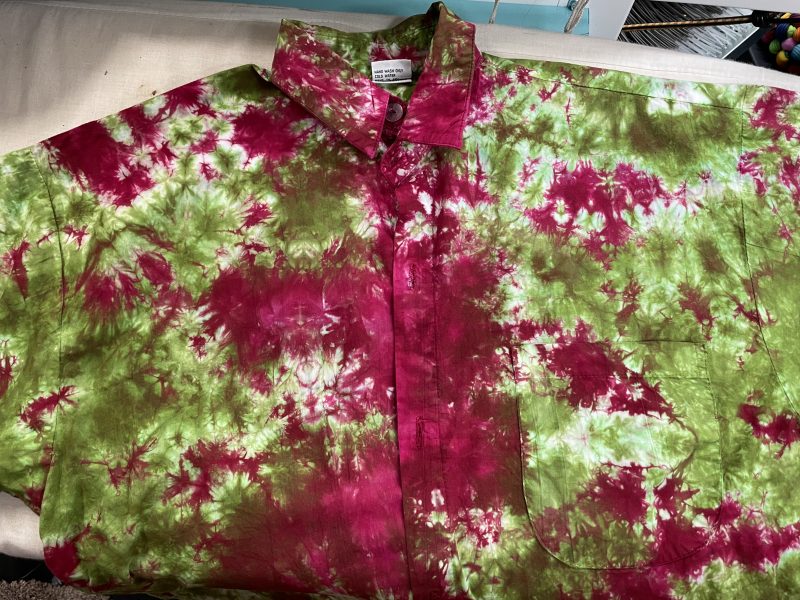
The photo really doesn’t do justice to the gradient, though. Let’s zoom in:

closeup of advancing twill gradient

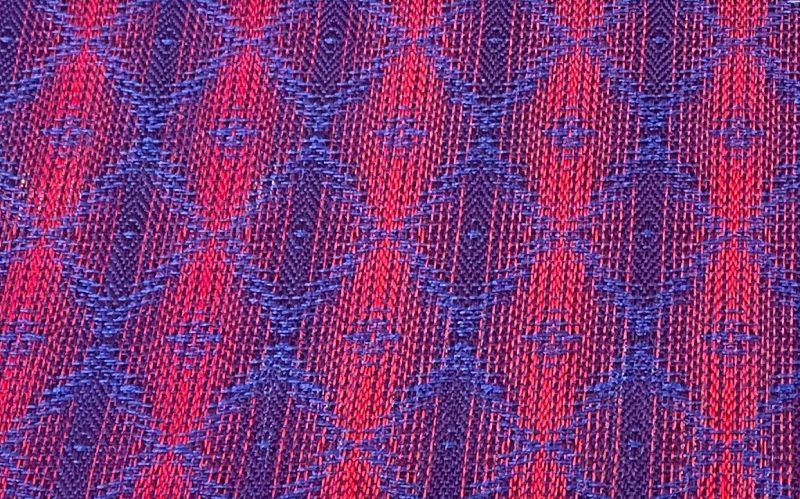
Closer up, you can see that the gradient gives an almost three-dimensional feel to the pattern, the illusion that it’s curved outward in the center. Nifty, eh?

Anyway, that’s just a doodle, experimenting to see how the method works. Now that I’ve figured out how to set up drafts and gradients to align with each other, I can get on with the business of designing the actual samples. To be honest, most of the samples are going to be much simpler than this; the class is going to be four or six weeks (I’m giving two options) and the first four weeks will probably be devoted to plain weave and twill. The last two weeks are going to be packed with information about cool drafts like this one.

Before I weave the samples, however, I have to design the class. On deck for this week is writing a detailed class outline, both for the free weave-along and for the more in-depth, paid class. I’m really looking forward to it! Once I know exactly what I’m teaching, I can design the samples and get to weaving.

Meanwhile, there’s an even more important battle front at home. Jamie was complaining that there was no chocolate in the house. That, of course, is an intolerable situation, so I fixed it:

chocolate covered dried apricots

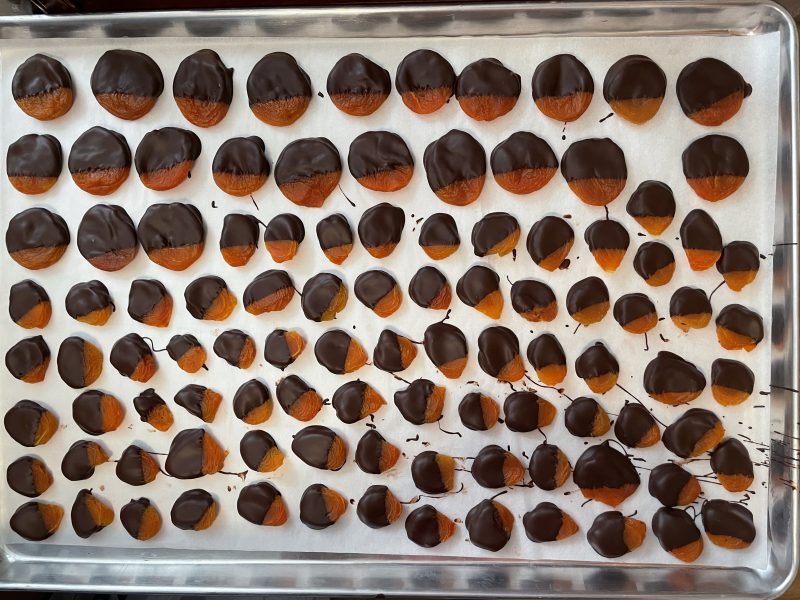
The apricots at the top are extra large slab apricots from the farmer’s market. The woman who sells them there says she only had 19 cases this year and her partner wanted to save them for big customers like Harry & David, but she said, Pfft! I’m giving them to my customers at the farmer’s market, the ones I see regularly and who actually care about me and my farm. The power of relationships. (The smaller apricots are her regular kind – better for snacking, but I thought it would be nice to have some big fancy ones to give away.)

And then I got some almonds and some dried Bing cherries from her as well:

almonds and dried cherries in chocolate
almonds and dried cherries in luscious chocolate!

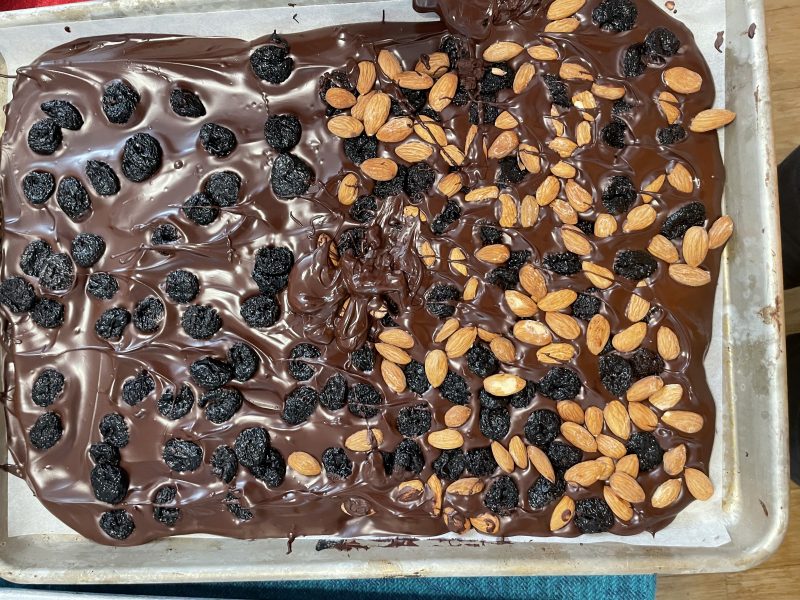
I did some plain chocolate bars and some almond bars, too, so Jamie should be kept in chocolate for quite some time!

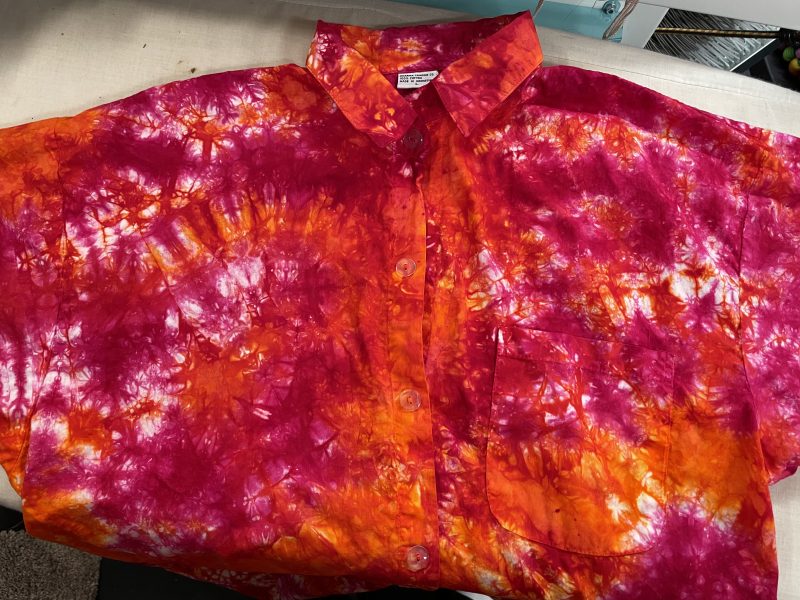
Finally, since the Fire warp looks like it will be weavable sometime in the reasonably near future, it’s time to think about what to do with it. As I mentioned a few blog posts ago, I’ve gotten fascinated by folded/origami books, so I’ve been investigating different book structures. I’m planning to experiment with several different book structures, including dragon books, flag books, and some fancier accordion structures – but the one that most intrigues me at the moment is the carousel/star configuration, so I’m going to make a carousel book prototype today. I’m also going to experiment with some methods of stiffening cloth into something suitable for book making – two methods were suggested to me, stiffening with konnyaku paste and backing with Japenese paper, and I’m planning on doing some modest experiments, if I can find appropriately sized scraps of handwoven cloth in the sample bin.

Here are some of the paper samples I plan to play with:

Japanese paper samples

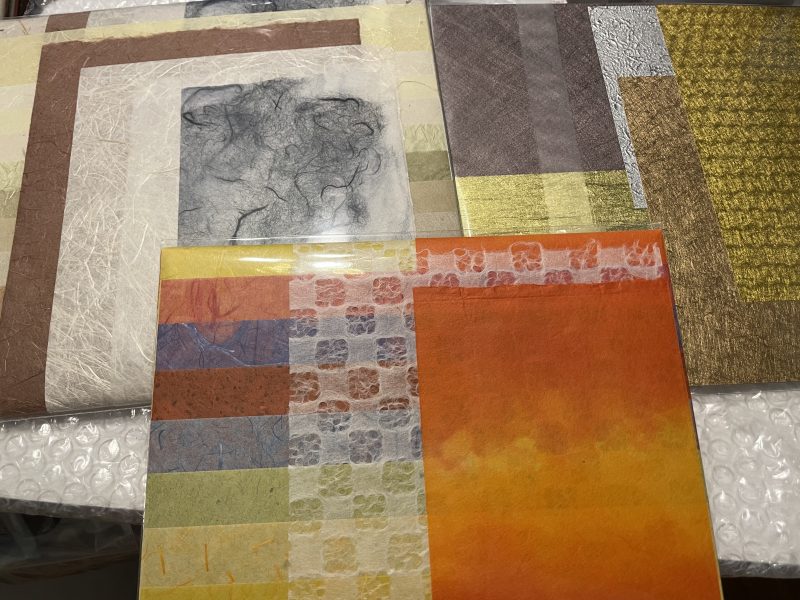
What fun! I’m glad to be able to make time for creative experiments again.

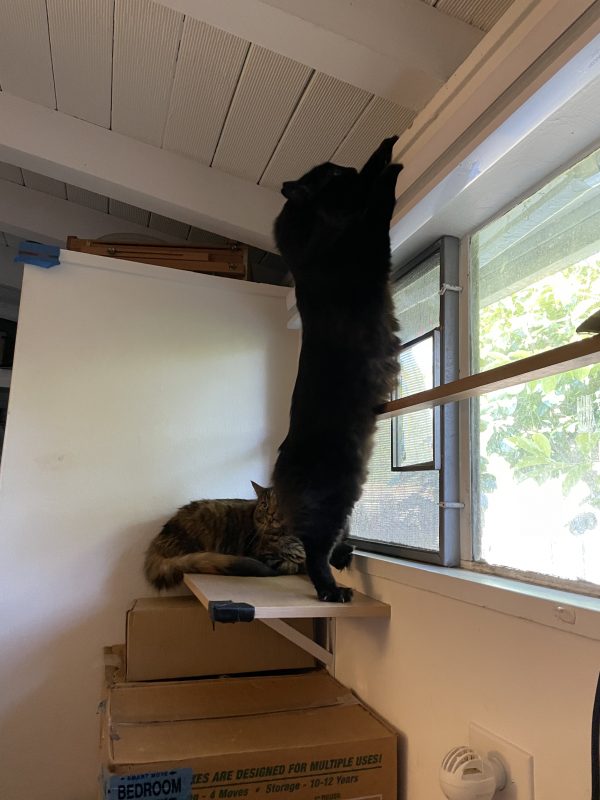
And, of course, it would be unthinkable to leave out the rulers of the household. Fritz and Tigress have been utterly fascinated by the persimmon tree outside the bedroom, where some birds have built a nest and thoughtfully populated it with constantly peeping cat toys. Sadly, they can’t get out to play with the cat toys (much to everyone’s relief), so they just have to settle for watching. But Fritz is very excited, and would like you to know that Tall Cat is Tall.

Fritz, the Tall Cat

Filed Under: All blog posts, food, chocolate, textiles, weaving Tagged With: bookmaking, gradient samples, fire warp

May 14, 2021 by Tien Chiu

Warping progress!

Back after a week or two to report material progress on all fronts!

On Grace, the heddles arrived, I finished threading, sleying, tying on, and debugging the warp. She is now fully warped up and ready to go:

Maryam with a warp fully threaded and ready to weave

Of course, that means I actually need to design something to WEAVE on her. That’s the next step. I am still figuring out the logistics of designing warp color gradients in Arahweave (jacquard design software)…I won’t bore you with the technical details, but let’s just say it’s a complex brain-teaser of a project. While I’m figuring that out, I may take a simpler route and weave weft color gradients in plain weave or twill. That will allow me to experiment with other color combinations and weaving techniques that will be useful for the Color Gradients classes I’ll be teaching in the fall.

Meanwhile, tying on the warp on Maryam continues…slowly. I’m now about 56% done. Here’s a picture before I started yesterday (I’ve since done a little more):

Warp being tied on on Maryam

I’ve already found two spots where I tied on the wrong color, but I’m not going to fix them until I’ve pulled the tied-on threads through the heddles and reed. I think it will be easier to fix those threads after pulling through.

I still have no idea what I’m going to do with that warp. I confess that I’ve kind of “fallen off the wagon” when it comes to reserving time for my own creative work…things were so intense with teaching a 4600-person class while trying to prepare for launch of another class that I simply didn’t have time to do anything else! But I am planning to get back to it now that things are a bit less crazy. For a month or so, anyway. Stash Weaving Success starts in early June, so I imagine I’ll have much less time starting in about three weeks. Better weave while the sun shines!

I’ll leave you with some of my favorite flowers…I found lilacs at the farmer’s market this past week! I’m super thrilled…I LOVE lilacs and they are hard to come by around here – the climate’s too warm for them, so I wait every year and hope to find someone selling them at the farmers market. Wonderful fragrance. I could stick my nose in them all day long. (Actually, I do! Good thing nobody watches me while I’m working.)

Lilacs from the farmers market

Filed Under: All blog posts, textiles, weaving Tagged With: gradient samples, fire warp

April 24, 2021 by Tien Chiu

Shifting gears: Gradients on Grace

Radio silence this week, for which I apologize, but it’s been a busy time with the teaching business! The Stash Busting Scarf Weave-Along has started, and with nearly 4,600 students both Janet and I have been hopping to keep up. I have had neither time nor brain to do any design work.

Nonetheless, progress has been inching along on the less brain-intensive stuff, and things are going well on the loom prep. Last week I switched from tying on 2,640 threads on Maryam to beaming on and threading 1,760 heddles on Amazing Grace. It went amazingly well!

Here’s a pic of the beaming process. I’m weaving three sets of samples, side by side, with different colors in each sample. Each sample is double density, enough yarn to weave two layers of cloth, because I want to weave stripes in two colors. The idea is you lift threads of certain colors to form the stripes in the top layer and then the remaining threads form the warp for the bottom layer. (If that makes no sense, don’t worry; it will become more obvious how this works once I start weaving and can demo it.)

As a result, there are six bouts, two for each sample, going onto the loom at once:

Warp being beamed using a trapeze
Warp being beamed

You may be wondering about the white spots in the warp. That’s where I tied off the warps when I wound them, to mark the color changes and also to prevent the dyes from running into each other at the color changes. The idea was to sync up the color changes so that they would line up perfectly. You can see the lined-up color changes and the ties in this photo of the dyed warp:

Dyed warp showing synchronized color changes and tied-off sections

You can see the tied-off sections in the foreground, just as the warps change color, and how the color changes line up at the ties.

Now, getting the color changes to sync up precisely is tricky. And getting the color changes to sync up precisely after beaming on 14 yards of warp is even more tricky. Which is why I was so pleased to see this at the end of beaming on said 14 yards of warp:

Beamed warp with nearly perfectly synchronized color changes

As you can see, the color changes are synchronized to within about 4” of each other. With four bouts, over a 14-yard warp, that’s pretty darn good! Of course I hope to do as well or better next time – I already have some ideas on how to improve. But this is very good, and since every color is about 1.5 yards in length this gives me plenty of “good” area to weave on.

You might wonder what I’m planning to weave on this. The answer is “color gradient samples”. These will be examples of color gradient striping, in every combination of weave structure, color combination, and warp and weft color gradient I could think of. Here is a simple example showing two possibilities in plain weave:

Color gradients in pain weave

There are lots more possibilities, of course. I plan to spend 14.5 yards exploring them.

First, though, I have to get the loom threaded. After a week’s work, I’m about halfway done (astonishingly fast progress, honest!):

Halfway threaded on Amazing Grace

I’m almost done with the first half. Alas, half the heddles are still en route to me. Through a series of tedious delays (mostly DHL’s fault – NEVER ship with DHL if you can avoid it, it’s been a nightmare!), my heddle kits are nearly two weeks late in arriving even though it’s an express international package. But unless DHL finds another creative way to delay my package, it should arrive on Monday or Tuesday, and I can resume threading then.

Until then, I can work on tying on Maryam’s warp. 31.2% done. Not that anyone is counting! 😉

Fortunately I have gorgeous flowers to comfort me. Others may still be stuck in snow, but it’s late spring in Northern California!

Roses in front of our house
California poppies
Yellow irises

Soon we will be on to early summer; in another two weeks or so, the first apricots and peaches will be coming to the farmer’s market. I can hardly wait.

Filed Under: All blog posts, textiles, weaving Tagged With: gradient samples

March 31, 2021 by Tien Chiu

41 miles of yarn

41.47 miles, actually, according to my calculations, but who’s counting?

Three-quarters of it is hand-painted, the other quarter is black. There are two warps.

Here’s the one for Maryam, the one you saw in the last blog post, finished and ready to go. I think it’s breathtakingly beautiful and can’t wait to weave on it!

"Fire" warp for Maryam
“Fire” warp for Maryam

It’s set up for double weave – one layer of warp will be black, so I can weave any color in combination with black, and the other layer will be the “fire” warp, in all its glorious shades of orange, red, and yellow.

The black warp isn’t as limiting as it sounds – by weaving a very weft-dominant fabric, I can actually transform it into virtually any other color. It will have dots of black in it, to be sure, so very light colors would be difficult to achieve, by medium to dark colors wouldn’t be too hard.

This warp is 2,680 threads (2,640 plus 40 extras to cover breakage), each of which is about 15.5 meters long. That’s 41,540 meters, or about 25.8 miles of yarn.

This warp is simply “Fire.”

And here’s the warp for Grace – that’s the sample warp for the Color Gradients class. I’m calling it “Gradients” for short. (You can attribute the names to a plethora of imagination – hey, I’m pre-coffee!)

Gradient warps for Maryam
gradient warps for Maryam

Each of the warps is about 12.5 meters long – 4 wraps round my 3 meter circumference mill, plus a few inches more traveling down the length from top to bottom of the mill and around the warping pegs. There are 1,760 ends (threads) in the warp, and it’s set up for double weave. The bottom layer will be 880 threads – that’s the big warp on the left – and the top layer will be three side by side sections of about 290 threads apiece. Those are the smaller warps. Put together they will allow me to weave gradients in whatever color sequences and weave structures I want, three color combinations across.

The Gradients warp is also not a traditional painted warp. Most painted warps are designed to blend colors into each other at the boundary between colors, to give a painterly effect. With the Gradients warp, I basically want to simulate solid colored warps, so I want abrupt, synchronized color changes across the entire warp. I want to weave multiple solid color samples on the same warp, so the goal is to get the color changes to line up precisely so there’s no waste. This is a bit of a trick.

What I did was wind the warp and tie it off while it was still on the warping mill, using ikat tape and a guide string to make sure that all the ties were in exactly the same place along the warp on every bout (or as close as I could get, anyway). This, at least in theory, will make sure that the color changes line up with each other.

It was difficult to show how this works because the color areas are relatively long in the warp, but I spread it out on a table and lined things up as best I could:

painted warps lined up so the color changes synchronize
synchronized color changes

It’s not perfect, but you can get the idea – the color changes synchronize across the length of the warp, so when Warp One changes colors, Warp Two (and Three, and Four) changes color at the same time.

The ikat tape (the plastic stuff wrapping the warp at the color changes) is designed for, well, ikat weaving, in which portions of the warp are bound off before dipping in dye (usually indigo). The bound areas resist the dye, creating patterning. Since ikat tape is specifically designed for this kind of work, it’s perfect for my much less stringent needs. (If you’re wondering where I bought it, I got it from John Marshall’s booth at Convergence. I don’t think he sells it mail-order, though, so you’ll have to try to catch him at a show. Before I found it I used Dharma Trading Company’s artificial sinew, which also works, though not as well.)

Here’s a closeup of the ikat tape, showing how it binds the warp and prevents the dye from running between sections:

ikat tape bound section of warp
ikat tape-bound section of warp

That probably doesn’t look that interesting if you aren’t a dyer, but if (like me) you’ve spent a ton of time trying to figure out how to keep one section of a painted warp from bleeding into another, getting that sharp and clean a demarcation between sections is nothing short of amazing. The Holy Grail, achieved.

The other secret is to blot excess dye out of the warp after painting. I can’t believe it took me that long to figure it out. The few resources on warp painting I could find all said simply to put on enough dye to cover the warp but not so much that it was dripping. I have never been able to reach a happy balance point where the dye reaches full coverage but doesn’t run more than I like it to during batching or steaming, so if avoiding running is critical, I blot my warps with a bit of paper towel after painting to pick up excess dye. It shouldn’t be dry, but it shouldn’t be dripping wet, either. No more problems!

Here’s what the warp looks like after the ikat tape is removed:

warp immediately after removing ikat tape

See how clean the line is?

And here’s the warp after it’s been spread out and fluffed a little:

fluffed out warp showing white areas where the ikat binding was removed

Obviously the white sections can’t be used in finished samples, but if I’ve done my job right, they should be lined up pretty closely so not much yarn should be wasted. I’ve budgeted about six inches of waste per color for the synchronization, which should (at least in theory) be plenty. It’s not actually completely wasted because I can use that section for testing, refining, and sampling the weave structures and stripe patterning for that particular section of samples. That would be waste in any case, so it all works out in the end.

I wound up with a little lagniappe at the end of all that warp-winding and dyeing. I had mixed up four gallons of dye for all that warp – which I knew was overkill, but dyes are relatively cheap, and running out of dye midway through painting a warp section would have been disastrous. (Let’s not even go there.) When I have excess dye, I simply add to my wardrobe. 90% of the time I run around in tie-dyed T-shirts and jeans, basically because if you’re a five-foot tall woman, with broad shoulders, and can deadlift 245 pounds and squat 200+ pounds, nothing off the rack is going to fit you anyway. And I live in California, where nobody dresses up for anything. So when I’m dyeing, and I have leftover dye, I just grab some T-shirts and some short-sleeve, button-up men’s shirts (that’s what passes for formal wear around here 😉 ), and throw them into the leftover dyes. I generally do low-water immersion dyeing, because it takes five minutes and no brains to dye a shirt and the results usually look great.

And here’s what I got out of it:

blue and green shirt
green and red-purple shirt
fuchsia and orange shirt

That’s the formalwear (hey, it’s California!), and I’m madly in love with all three of them, especially the fuchsia/orange and the blue/green shirts. Heck, all three are wonderful. It’s hard to pick a favorite.

Then there are the T-shirts. I’m less enthused by them, not because they aren’t pretty, but because the colors aren’t really “me”. This one, for example, is pretty, but far too conservative for magpie me:

red wine and indigo shirt

And this one is a little too chartreuse (in real life it is brilliant yellow-green with patches of bright and rusty orange):

chartreuse and orange shirt

Fortunately, though, Jamie fell madly in love with the last T-shirt and immediately carted it off to her lair, so everything has found a home except the red-and-blue T-shirt, which I will probably give away. I have lots of T-shirts already, and T-shirts are cheap at about $2.50 apiece, so one more or less makes very little difference. And the excess dye got used!

Next step is to put the warps onto the loom. Jamie and I spent a full day over my vacation (I’m back to work now) swapping out the guts of the looms – we still need to rearrange some parts, which I’ve ordered from Tronrud Engineering in Norway, but meanwhile I can get started beaming the warps, and threading up Maryam. With 2,640 warps to tie on, that’s going to take quite awhile. And after that, I’ll need to thread 1,760 heddles on Amazing Grace. Better find some good audiobooks!

Filed Under: All blog posts, textiles, dyeing, weaving Tagged With: gradient samples, fire warp

Subscribe to Blog via Email

Information resources

  • Dye samples
    • Procion MX fiber-reactive dye samples on cotton
    • How to "read" the dye sample sets
    • Dye sample strategy - the "Cube" method
  • How-Tos
    • Dyeing and surface design
    • Weaving
    • Designing handwoven cloth
    • Sewing

Blog posts

  • All blog posts
    • food
      • chocolate
    • musings
    • textiles
      • dyeing
      • knitting
      • sewing
      • surface design
      • weaving
    • writing

Archives

Photos from my travels

  • Dye samples
    • Procion MX fiber-reactive dye samples on cotton
    • How to "read" the dye sample sets
    • Dye sample strategy - the "Cube" method
  • Travels
    • Thailand
    • Cambodia
    • Vietnam
    • Laos
    • India
    • Ghana
    • China

Travel Blog

Entertaining miscellanies

© Copyright 2016 Tien Chiu · All Rights Reserved ·


Loading Comments...